Select Profile
Overview
This page explains how to select and apply a profile you've already created in Geergit. Profiles are saved identity configurations containing randomized spoofed values (Android ID, IMEI, MAC addresses, device information, etc.) for your target app or group. Importing a profile instantly applies those saved values, and optionally restores associated app data if Backup App Data is enabled.
Prerequisites
- Alpha membership (required to use Profiles features)
- At least one existing identity profile already created or saved inside Geergit
- The application you want to configure is installed on your device
- For app data restoration, Root access and Backup App Data feature must be enabled
For detailed information about creating and managing profiles, see the Profiles guide. For details about identity fields, see the Identity overview.
Where to find saved profiles
Saved profiles are visible in two main places:
- Individual app — open a specific app to see profiles that target that app
- Group — open a group to see profiles that apply to all apps in that group
Both lists show the profile name, folder (if organized), a short preview of key notes you have saved, and actions (Apply, Edit, Delete).
Note: Ensure you have the latest version of Geergit installed.
Step 1: Open the App You Want to Configure
- Launch Geergit.
- Browse the list of installed apps on the home screen.
- Tap the app for which you want to import a profile.
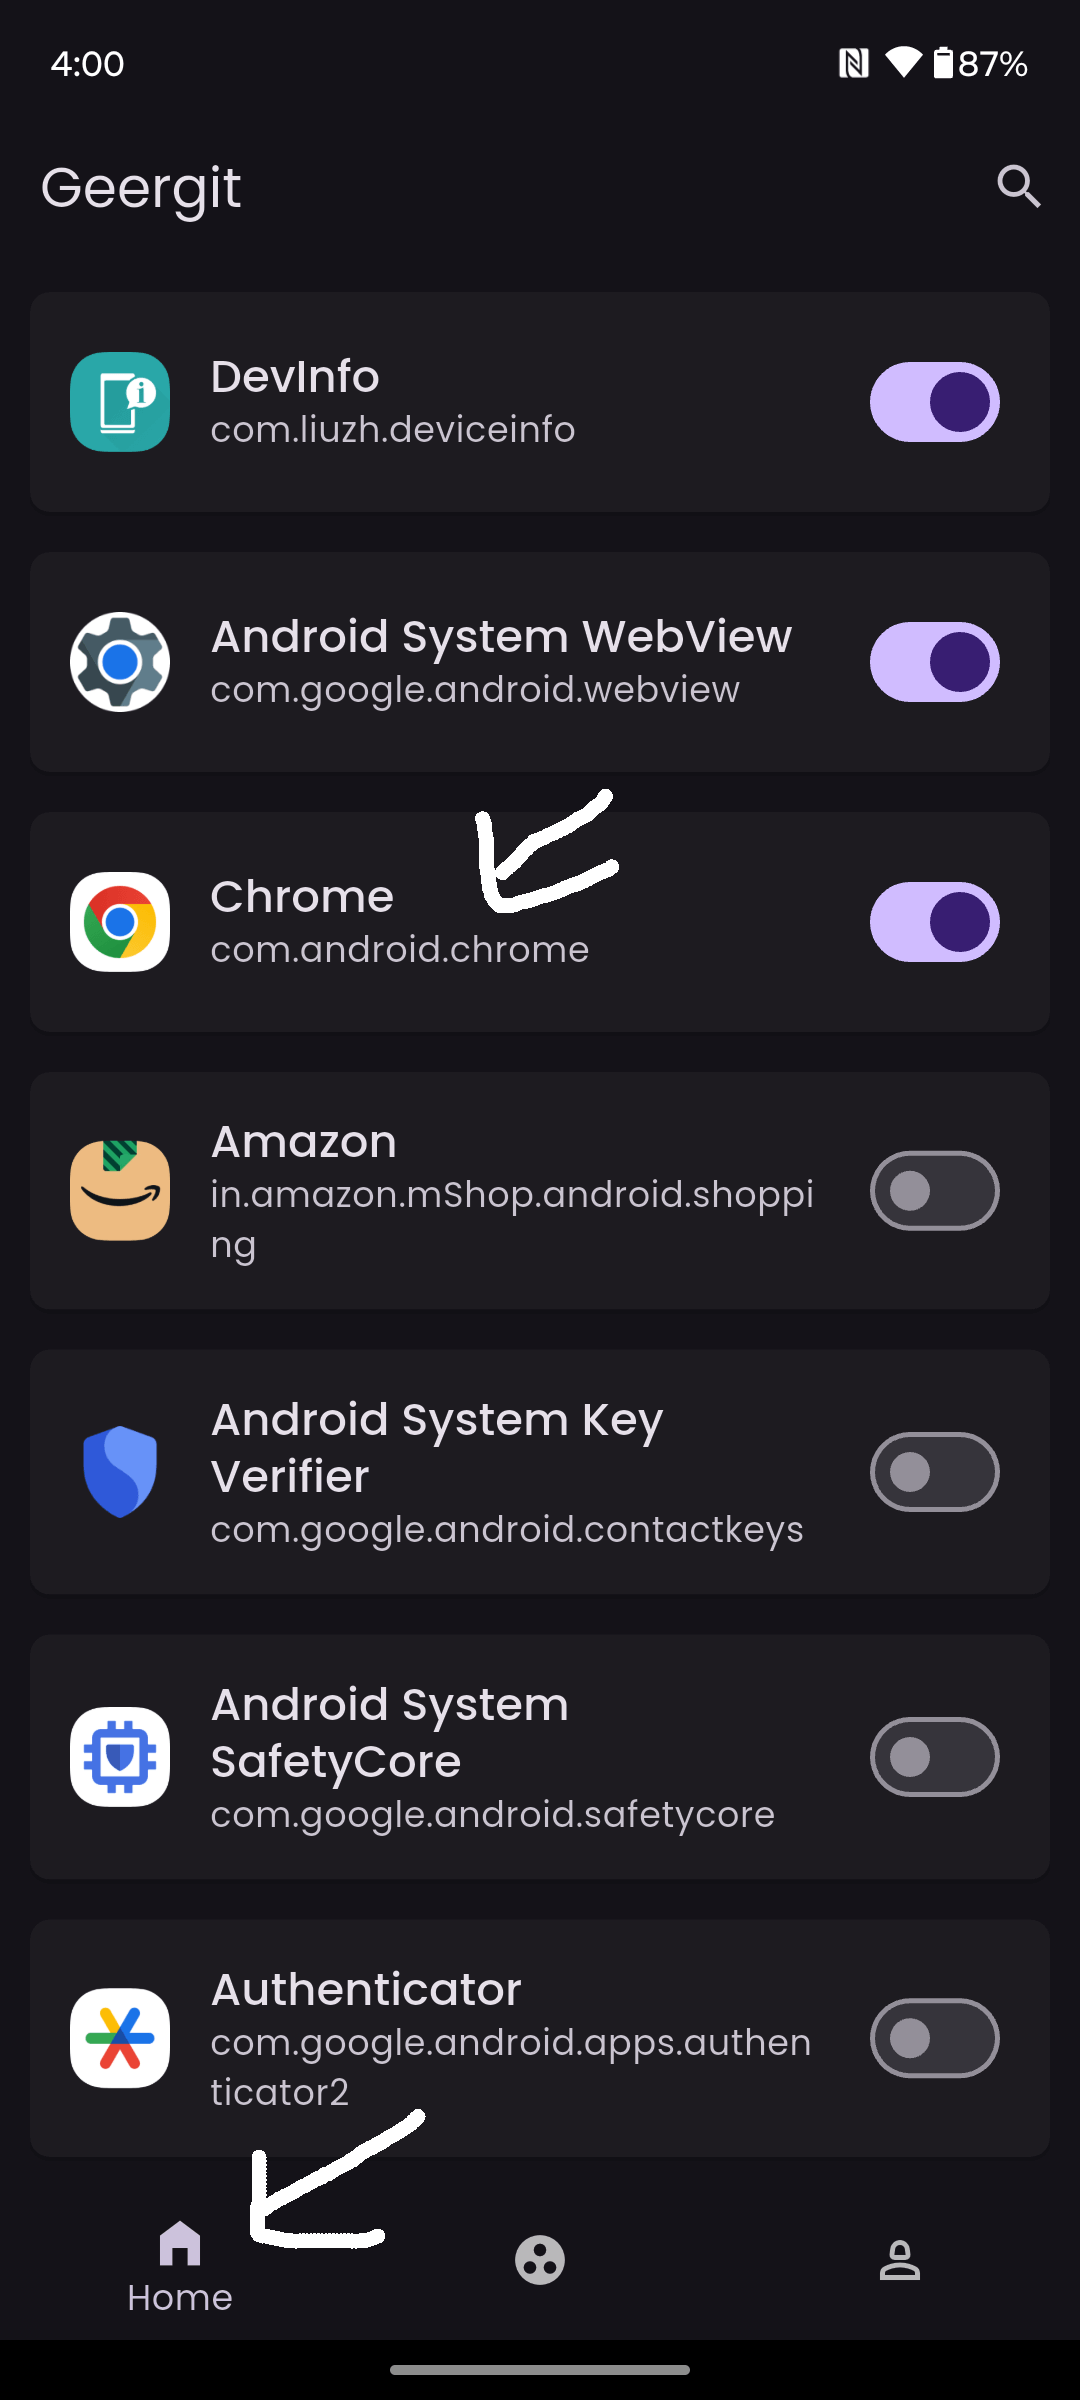
Figure 1: Selecting an app to configure.
Step 2: Navigate to the Identity Section
- After selecting the app, you will see tabs like Identity and Settings at the top.
- Tap the Identity tab to access the profile controls.
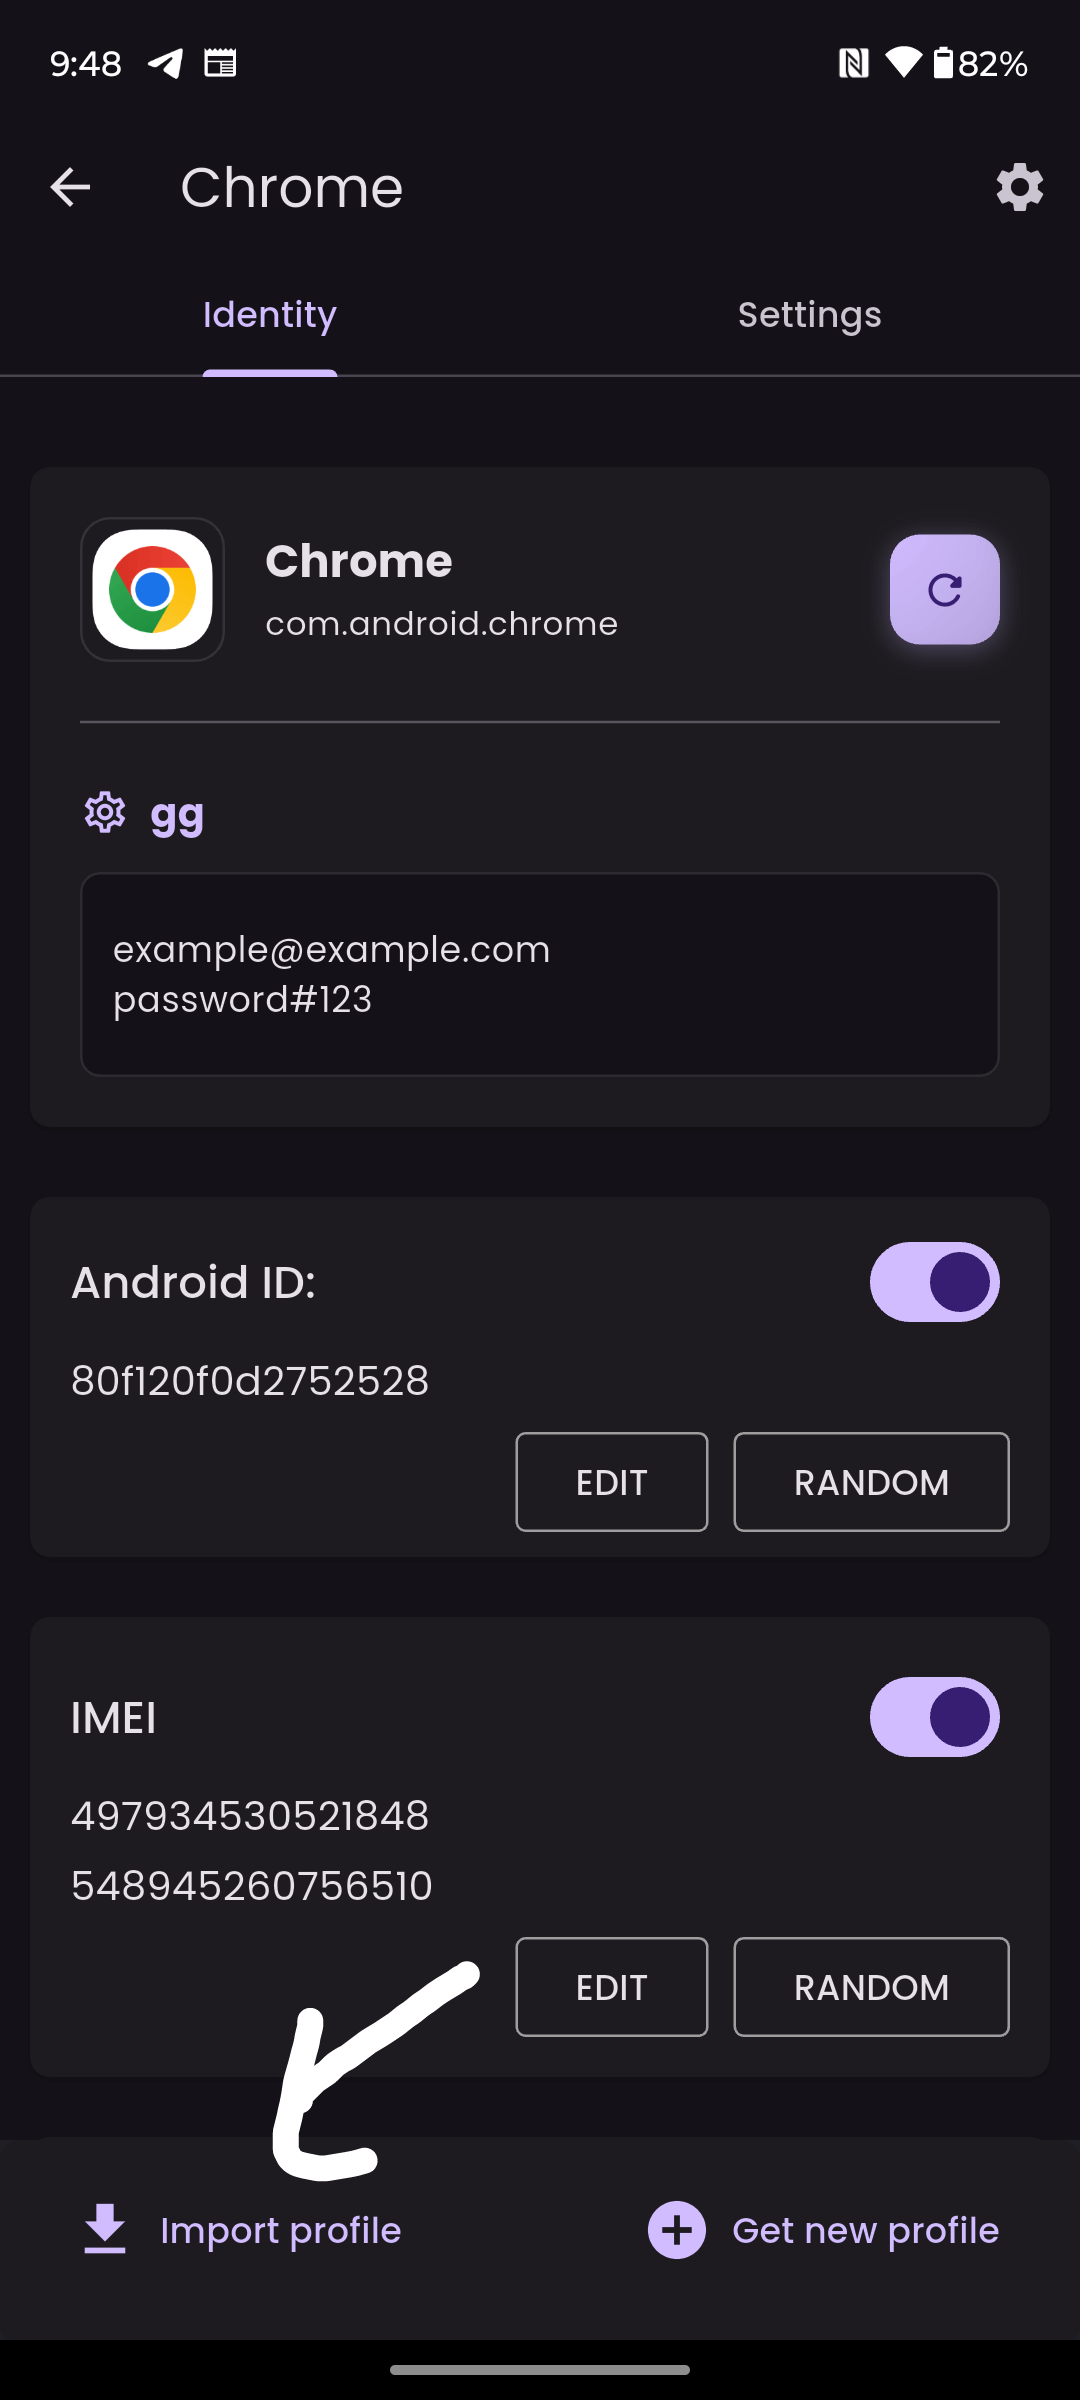
Figure 2: Opening the Identity screen.
Step 3: Import an Existing Profile
- Scroll to the bottom of the Identity screen.
- Tap the button labeled Import Profile.
- A list of all available profiles stored in Geergit will appear:
- Profile names, folders, and preview notes are displayed
- Each profile contains a complete set of randomized identity values (or customized values if you edited them manually after creation)
- Select the profile you want to apply.
- The profile will immediately load and replace all fields:
- Identity values update instantly — Android ID, IMEI, MAC addresses, device information, and all other spoofed values change to the profile's values
- App data is restored — If Backup App Data is enabled, any app data associated with this profile is automatically restored
- App continues running — The victim app continues with the new identity; you may need to manually stop/clear it to see the changes
!TIP After importing a profile, you can still modify individual fields (like Android ID or IMEI) if needed. Edits are automatically synced to the cloud when you leave the Identity section. See the Manage Identity guide for field editing details.
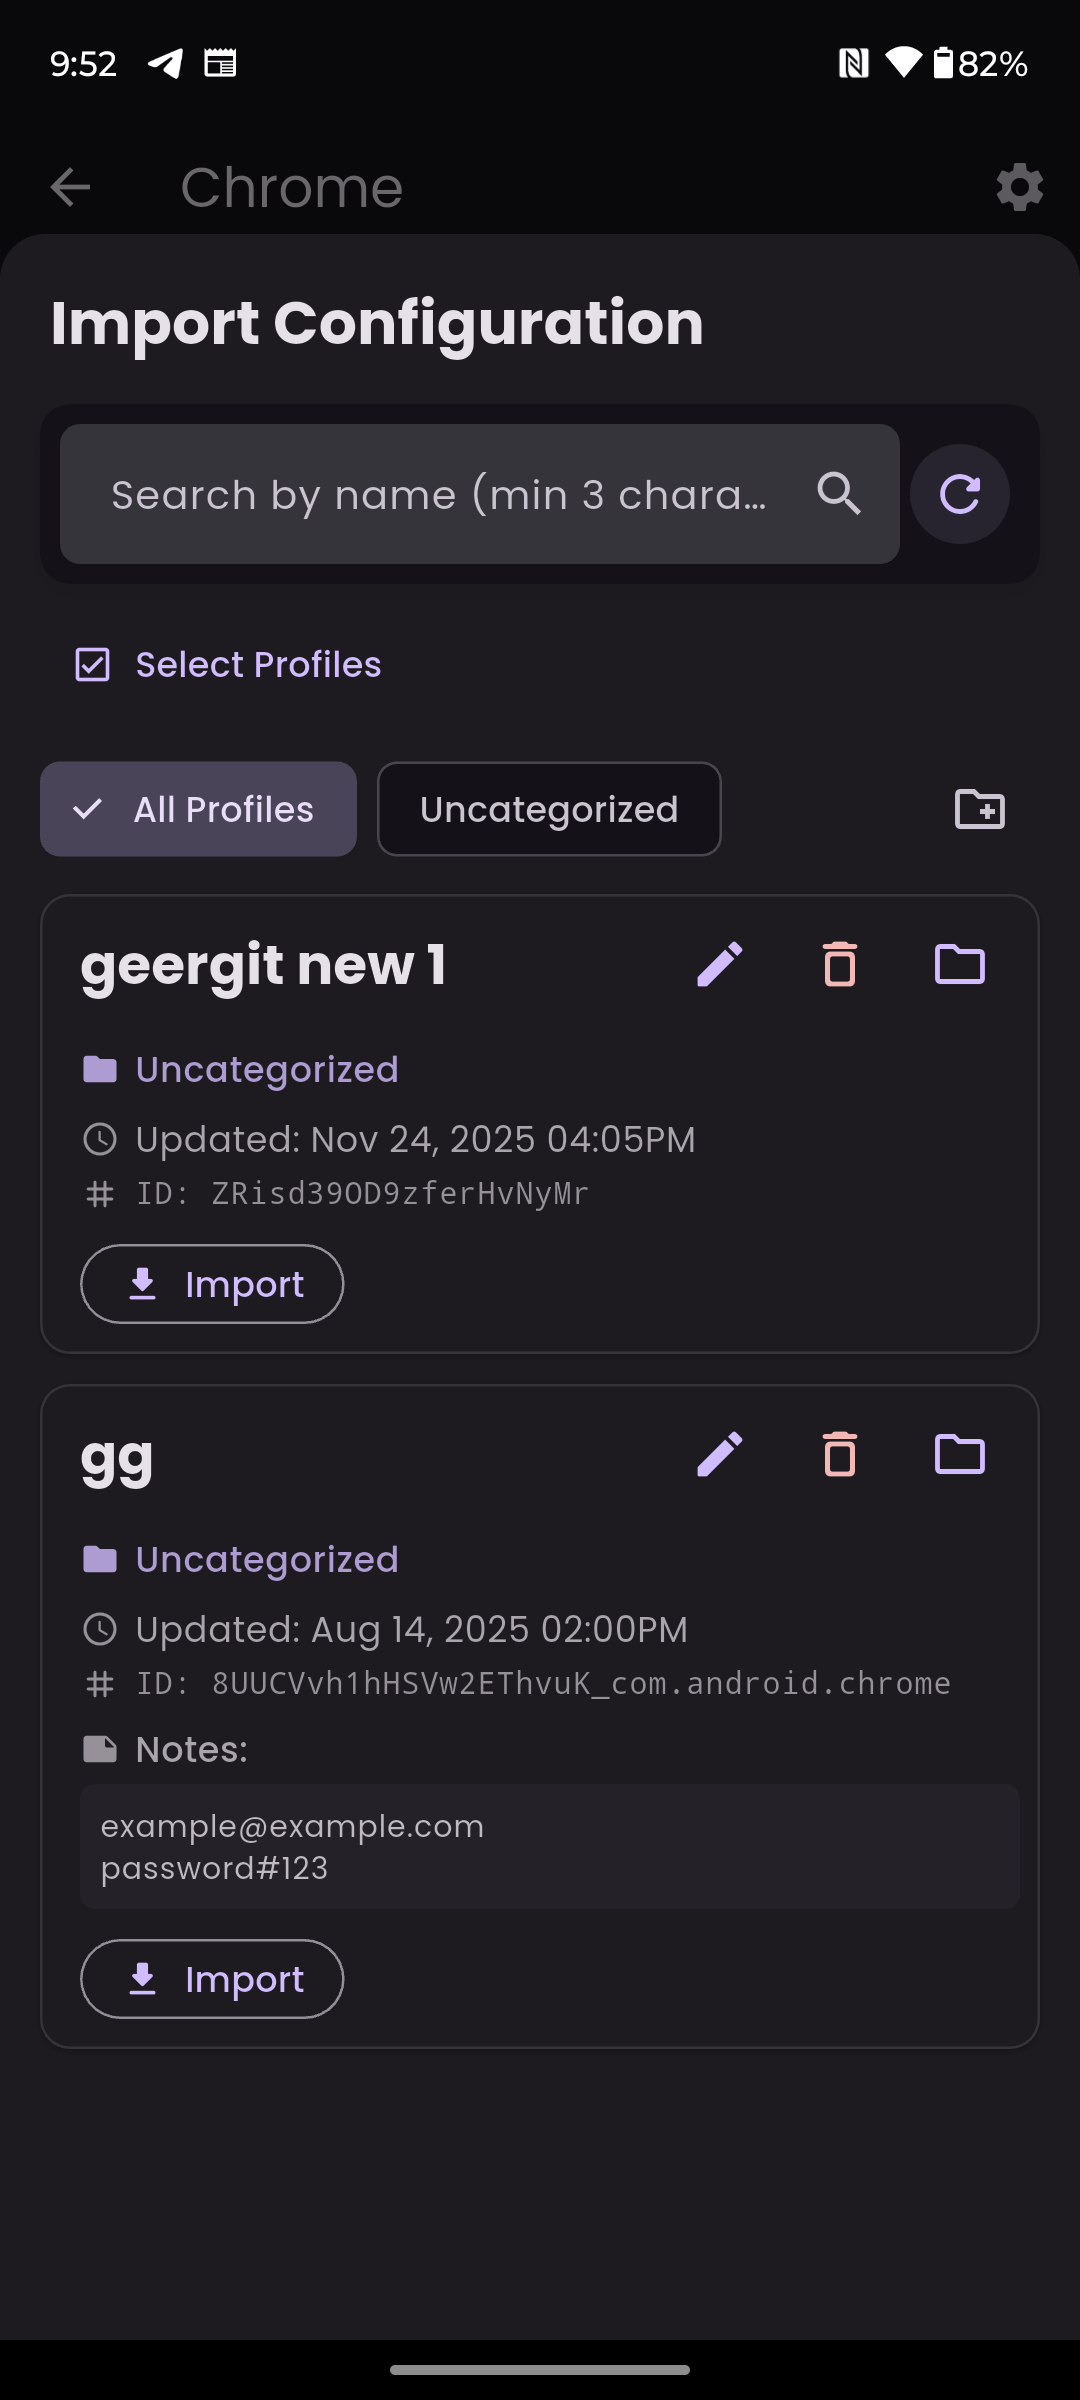
Figure 3: Importing an existing profile into the app.
Step 4: App Data Restoration (If Backup App Data Enabled)
When you import a profile with backed-up app data:
- Automatic restore — Geergit automatically restores any backed-up app data associated with the profile
- Relaunch app — Restart the app to access the restored data and login sessions
- Account instantly available — If you had logged into an account with that profile, your login is preserved
- No manual setup — No need to re-enter credentials or reconfigure the app
!NOTE App data restoration requires Root access and the Backup App Data feature to be enabled. See the Profiles guide for details on enabling this feature.
Step 5: Switch Profiles Anytime
You can instantly switch between different profiles:
- Tap the Import Profile button again
- Select a different profile from the list
- All identity fields instantly update to the new profile's values
- If Backup App Data is enabled, the associated app data is restored
- When you leave the Identity section, changes are automatically synced to the cloud
Important Notes on Profile Switching
- Previous profile not affected — Switching to a different profile does not modify the previous profile
- Manual edits allowed — After importing a profile, you can manually edit individual fields if desired
- Automatic backup — When you leave the Identity section, your edits are automatically backed up to the cloud
Common Workflows
Rapid Profile Switching (Testing Multiple Identities)
- Import Profile A → See identity values from Profile A
- Manually stop/clear the app if needed (or wait if Backup App Data is enabled)
- Test the app behavior with Profile A's identity
- Import Profile B → All identity values change to Profile B instantly
- Repeat to compare app behavior across different identities
Account Switching with Backup App Data
- Import Profile A → Account A login is automatically restored (if Backup App Data enabled)
- Use the app with Account A
- Import Profile B → Account B login is automatically restored instantly
- Switch back and forth between accounts without re-logging in each time
Device Configuration Testing
- Import "Android_13_Samsung" profile → See Samsung + Android 13 device identifiers
- Test app behavior with this device configuration
- Import "Android_14_Google" profile → See Google Pixel + Android 14 device identifiers
- Compare app behavior across different device configurations
- Profiles preserve all device information for consistent testing
Related Guides
- Profiles guide — Create and manage profiles
- Generate Identity — Create new identities for profiles
- Manage Identity — Edit individual identity fields
- Identity overview — Learn about all spoofed identifiers