Setup
Get started with Geergit - installation and configuration.
Prerequisites
- Rooted Android Device — Root access required
- Xposed Framework — One of: Xposed, LSPosed, or EdXposed
- Android 9+ — Minimum supported version
- Backup — Back up your ROM and important data before proceeding
Installation Steps
Step 1: Download & Install Geergit
- Download the latest Geergit APK from the official download page
- Install the APK on your device
- Proceed to next step
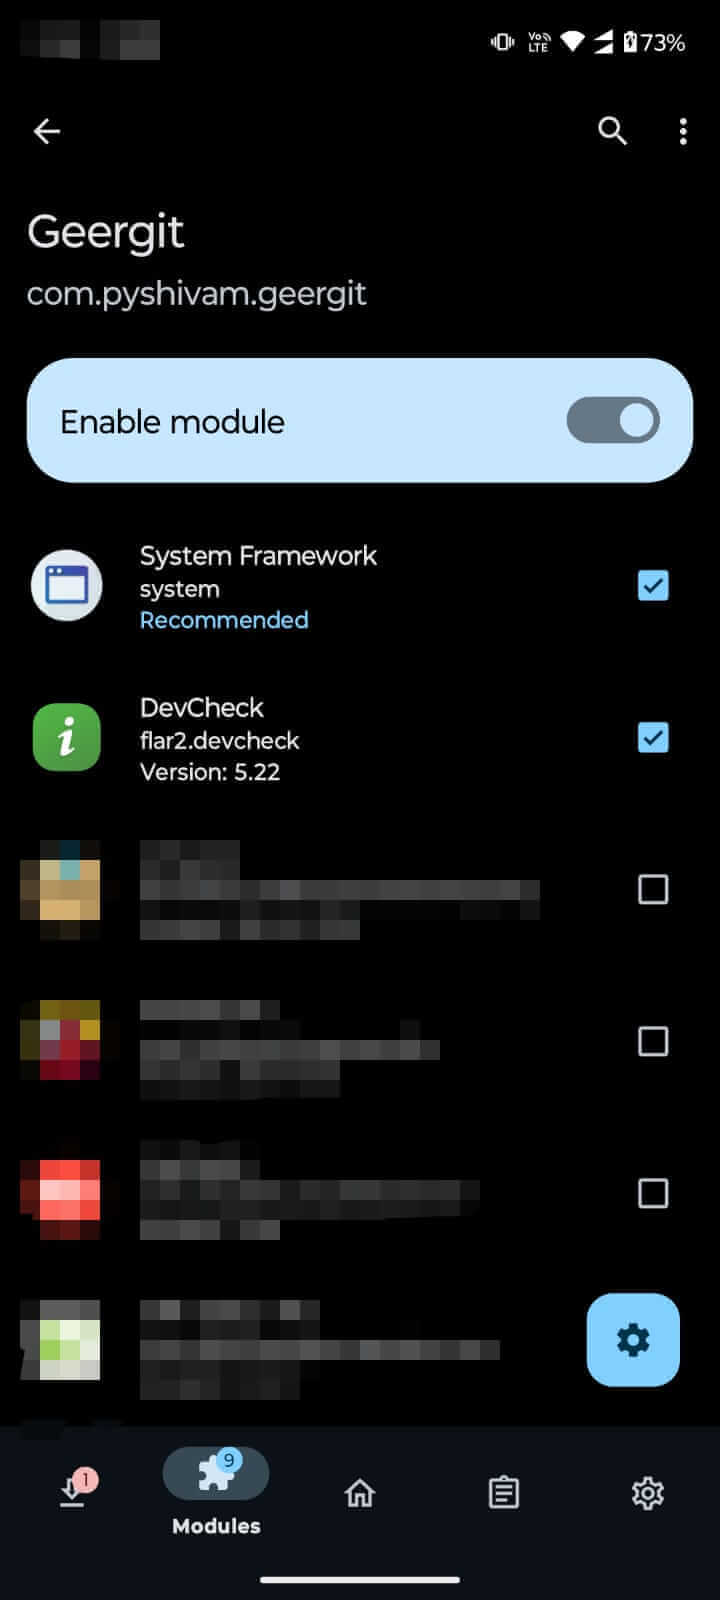
Step 2: Enable Geergit in Xposed/LSPosed
- Open Xposed Manager or LSPosed Manager app
- Go to Modules section
- Enable Geergit from the list
- SELECT TARGET APPS for Geergit (choose apps you want Geergit to spoof)
- Make sure System Framework is selected in the scope
- Save and close the app
Step 3: Reboot Device
- Reboot your device to activate Geergit in the Xposed framework
- Wait for device to fully boot
Step 4: Grant Root Access to Geergit
- Open Geergit app
- When prompted, Allow Root Access
- If using KernelSU or APatch, manually grant root access to Geergit via your root manager
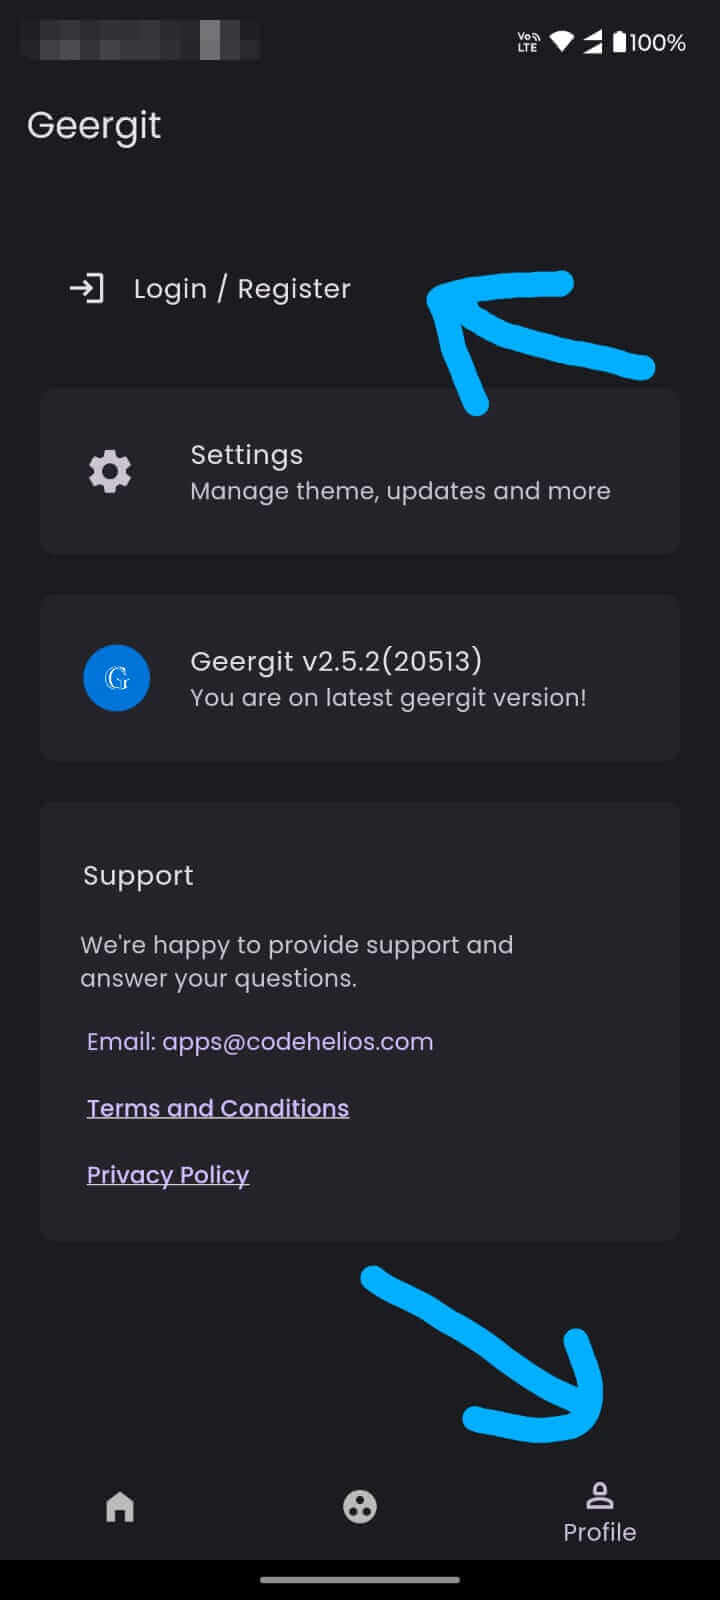
Step 5: Create Your Account
- You'll be prompted to Register or Login with your email
- Enter your email and create an account
- Confirm your email if needed
- Login to Geergit
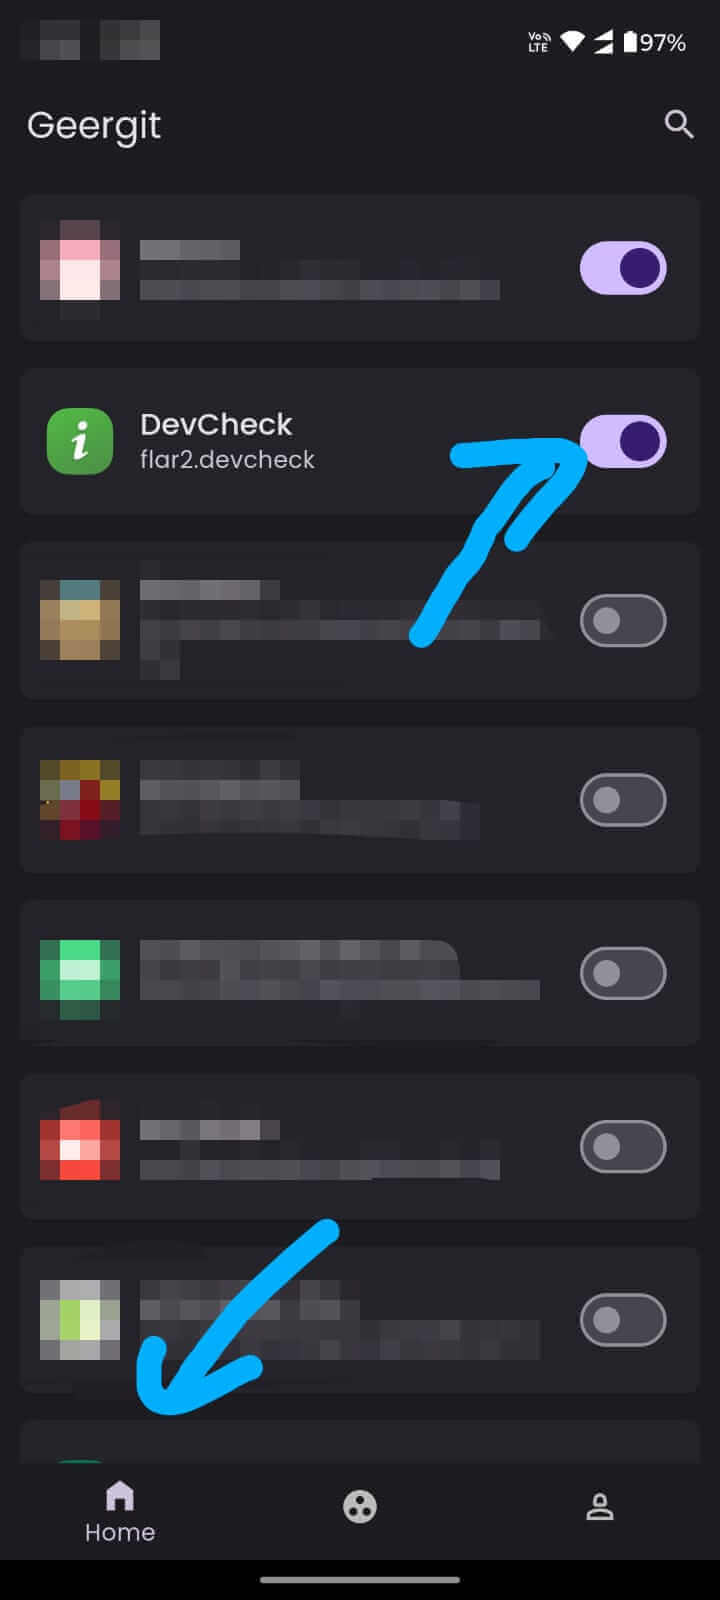
Step 6: Select & Enable Target App
- From the Geergit home screen, Search and find the app you want to spoof
- Enable the app by tapping its checkbox
- Tap the app logo to open its configuration
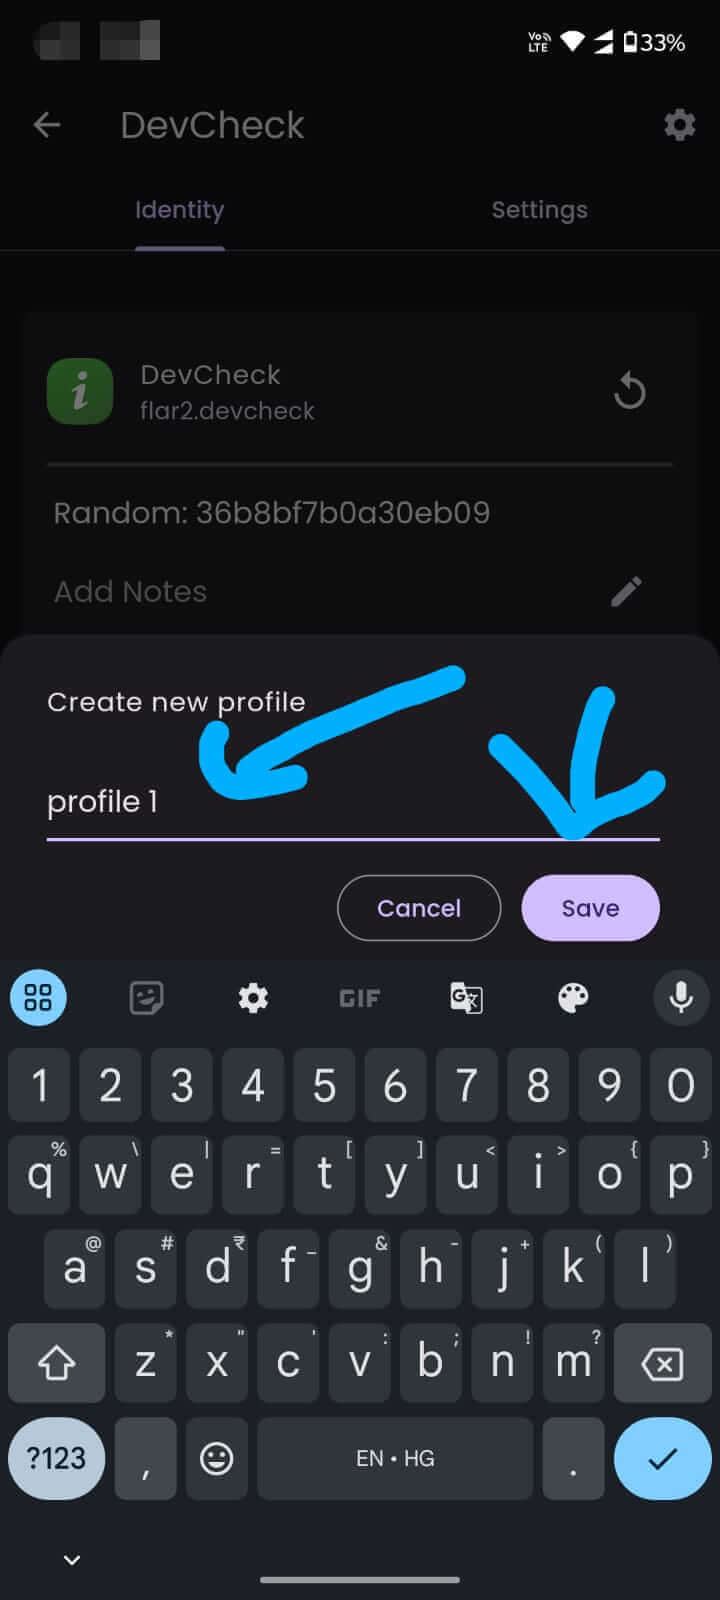
Step 7: Create Initial Profile
- On first open, Geergit will ask you to create a profile for this app
- Enter a profile name (any name you prefer)
- Click Save
- This creates your first saved identity configuration
Step 8: Configure Identity Fields
- The Identity section opens automatically
- Enable the fields you want to spoof
- Some advanced features require Alpha membership — check pricing for details
- Customize identifiers or tap Generate for random values
For detailed guidance on each field, see the Manage Identity guide.
Step 9: Finalize Configuration
- After enabling and customizing all desired fields, force stop or remove the target app from recents
- Reopen the app to apply Geergit's spoofed identifiers
- The app should now perceive the spoofed device identity
Verification
To verify Geergit is working:
- Open your target app
- The app should see your spoofed identifiers instead of real device IDs
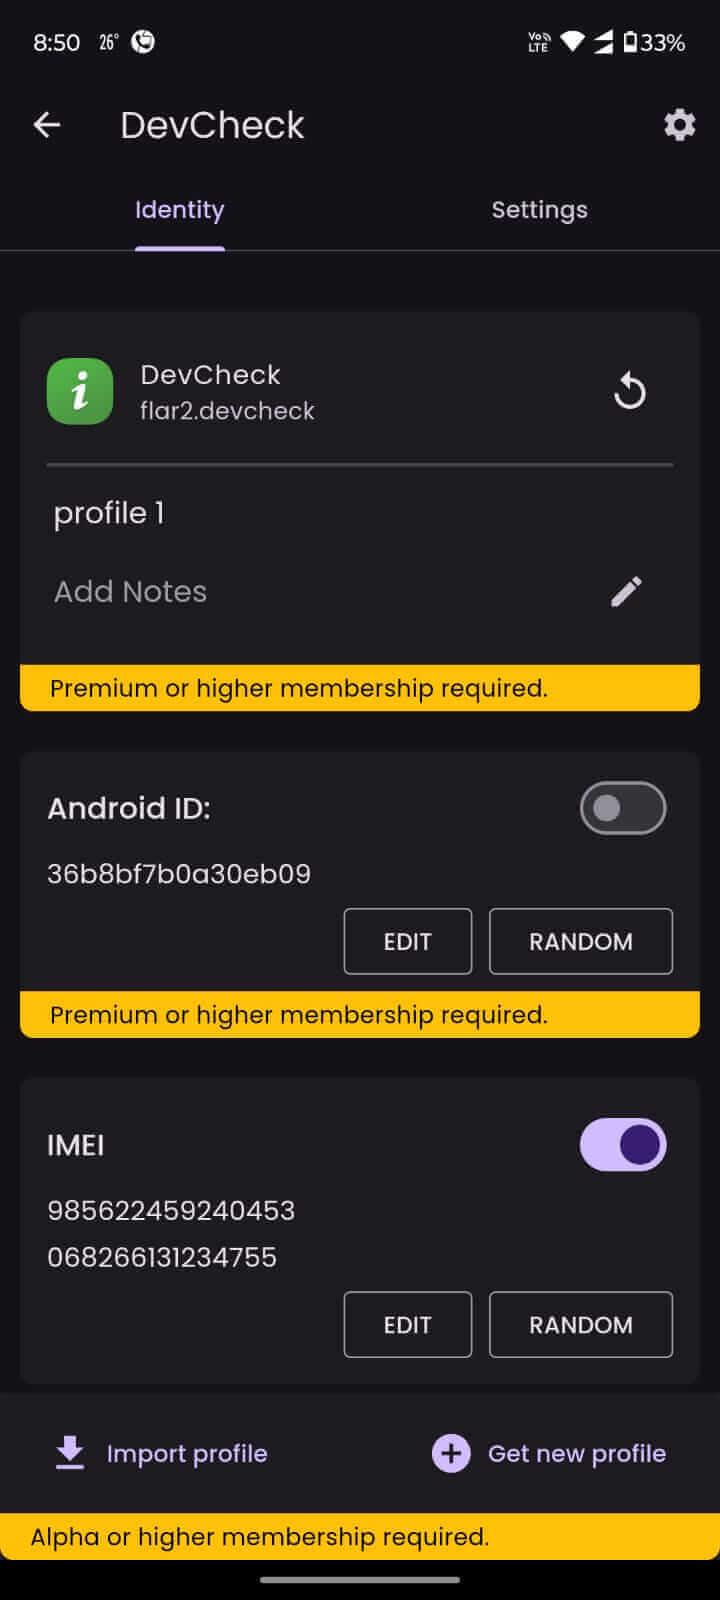
- Check device info apps (like DevCheck or CPU-Z) to confirm they show spoofed values
- Some anti-detection apps may show warnings, which is expected
Common Issues
Xposed not activating?
- Ensure Xposed/LSPosed is properly installed
- Reboot device after enabling modules
- Check Xposed logs for errors
Root access denied?
- Grant Geergit root access via your root manager (Magisk, KernelSU, etc.)
- Ensure your device has proper root environment
App not applying spoofs?
- Make sure Geergit is enabled in Xposed and target app is selected
- Restart the target app after configuration
- Force stop the app completely
Profile not saving?
- Verify internet connection
- Check if account is properly logged in
- Try creating profile again
Next Steps
- Learn about the Identity section to manage identifiers
- Explore how to generate identities
- Discover how to edit individual fields
- Check out Profiles to save and organize identities (Alpha feature)